Restrict Hard Drive Access to Local Accounts on Windows 10 (2021)
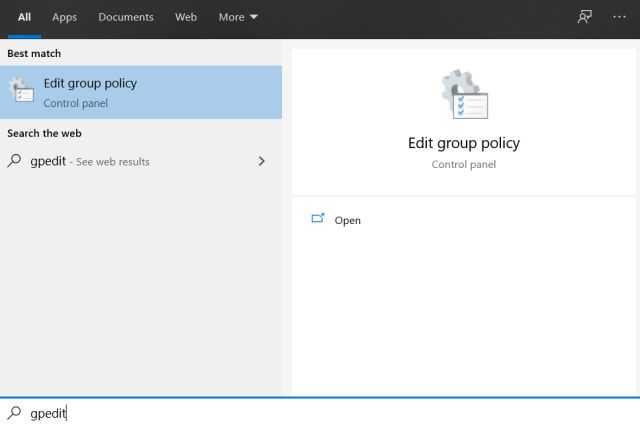
First of all, press the “Windows” key once and type gpedit and open “Edit Group Policy” from the search result. If Group Policy is not showing up on your PC then you are most probably running Windows 10 Home. You can find out how to enable Group Policy on Windows 10 Home.
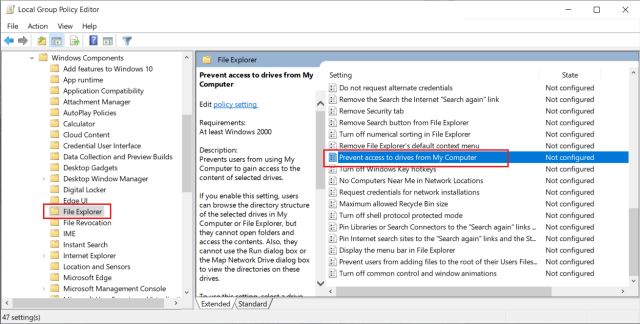
Next, under “User Configuration”, click on “Administrative Templates” and then expand the “Windows Components” folder.
Now, under “Windows Components”, look for “File Explorer” and open it. On the right pane, search for “Prevent access to drives from My Computer”.
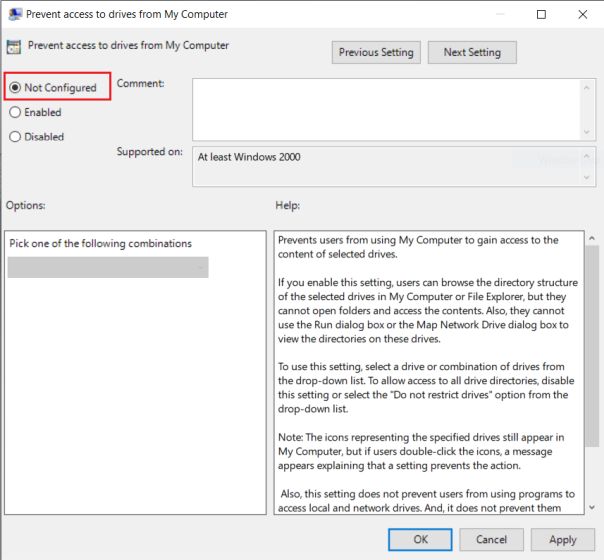
Double-click on it and a new window will open up. Here, click on “Enabled” and choose “Restrict all drives” from the drop-down menu. Finally, click on “OK” and you are done. No need to restart the computer.
Just switch to another user account and try to open the hard drive. You will get this error. You have now successfully restricted hard drive access to local accounts on Windows 10.
To allow hard drive access from all user accounts, you just need to change the setting to “Not Configured”. After that, click on “OK” and that’s it.
Block Access to Hard Drive on Windows 10
So that is how you can restrict hard drive access to local accounts on Windows 10. I tested the feature on Windows 10 Insider Preview and it worked pretty well. In case, you want to restrict a specific drive then you can choose that under the drop-down menu. Anyway, that is all from us. For more such Windows 10 tips and tricks, you can go through our linked article. And if you have any questions then let us know in the comment section below.


