Functionality-wise, Kodi provides an interface that lets you easily access all your media – including videos, photos, music – stored on a hard drive, optical disc, local network, as well as on the Internet. It uses a 10-foot user interface and a remote control as a primary input device, which is inline with its design philosophy – a media player application for your living room. In this article, we will discuss the how-to of Kodi download and installation on the newly-released Ubuntu 16.04. Plus, we’ll also explain in detail, the basic set-up of the media center.
Download and Install Kodi
Assuming that you’ve already upgraded your Ubuntu box to version 16.04, here’s a set of commands that you need to run in order to install Kodi: If everything goes fine, the latest version of the media center application will be installed on your system. For example, in my case, version 16.1 – which is the latest stable version – was installed, something which I confirmed by running the following command:
Basic Setup
Once the download/installation part is complete, head to the Unity Dash and launch Kodi from there.
On the home screen, you’ll see a horizontal menu displaying several options/categories including Videos, Music, Pictures, Programs, and more.
Needless to say that – once Kodi is set-up properly – the Videos section will let you browse and play all the videos that the application detects on your system; same for Music, and so on.
Watching Local Content
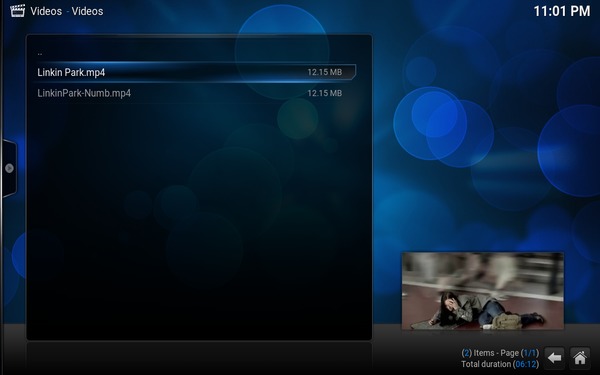
To make your local content visible to Kodi, click on the relevant option (for example, ‘Videos’ in case of video content), and then click ‘Files‘ sub option. Complete the set-up that follows, and you’ll see your content listed in the media player’s interface. For example, the following screen-shots were taken while I was adding videos stored on my HDD to Kodi:
To play a video file, just click on the listing. For example, I clicked on the ‘Linkin Park.mp4‘ file listed in the window shown above, and the playback started.
Quite a few settings related to playback – for example, whether or not you want subtitles – can be accessed from the playback window itself. So, we just learned how to make your local videos visible to Kodi. You can follow similar steps to make your local music files and photos discoverable. That was all about your local content, but what about content stored online (for example, your YouTube subscriptions)? Well, with Kodi, you can access all that as well, and this is where Kodi add-ons come into the picture.
Installing Add-ons
Let’s take an example that explains how to browse YouTube content from Kodi. The first step here is to click on the ‘Add-ons‘ sub-option (instead of the ‘Files’ sub-option) under the Videos category on the application’s home page. Assuming this is the first time you’re playing with add-ons, no add-ons will be displayed, with only a ‘Get more‘ option that helps you install them.
Click on ‘Get more‘ and you’ll see a list of add-ons available. Scroll this list and select ‘YouTube‘.
As you click on ‘YouTube,’ the add-on will be installed. However, to use it, you need to set it up, which basically involves authorize it to access your YouTube account:
Once the authorization step is over, you’ll be able to access YouTube content from Kodi.
This way, you can install other available add-ons to access media content from the Internet.
Tips and Tricks
Kodi requires you to name your media files in a particular format as it helps media scrapers to pick up the correct information. Head here to learn more about it.
Make sure your videos, music, and photos are kept in separate directories. This will help you avoid unnecessary problems when you ask Kodi to scan media on your system.
While basic settings can be accessed from System->Settings on the home screen, the configuration file(s) are located in $HOME/.kodi/ folder on your system – you are advised not make any changes in this folder until of course you know exactly what you’re doing.
You can read our article on Kodi tips and tricks to learn more about Kodi. SEE ALSO: 5 Best Live TV Addons For Kodi
Conclusion
We mainly focused on the installation and basic set-up of Kodi in this article. However, as far as functionality goes, we’ve barely scratched the surface here as Kodi offers a lot of features. Head to the official Kodi Wiki to learn more about the media center’s capabilities.