Delete Temporary Files in Window 10
Windows 10 offers you a number of different ways to delete junk files on your computer. Today, we will discuss the best and fastest ways to delete temporary files in Windows 10. For that, we will use various built-in tools such as Disk Management, Disk Cleanup, Storage Sense and more. We will also tell you how you can manually delete temp files in Windows 10. So without further ado, let’s check out how we can remove temporary files in Windows 10.
Method 1: Using System Settings
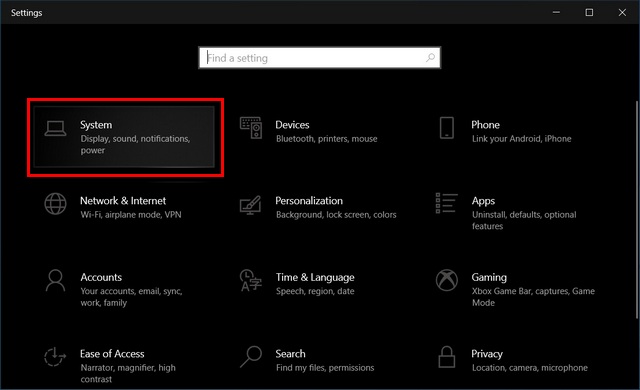
Firstly, go to Settings (Windows key + I) > System.
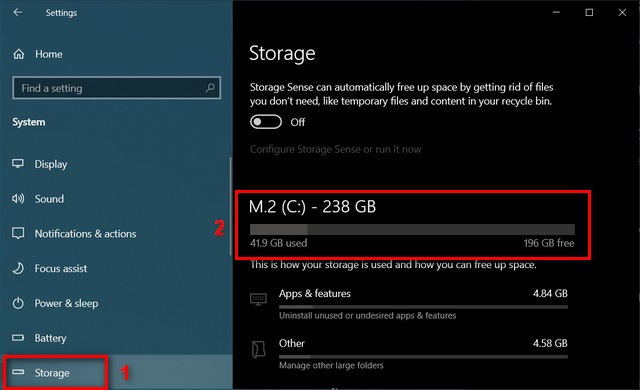
In the next page, click on ‘Storage’ and choose the local drive that you want to cleanup.
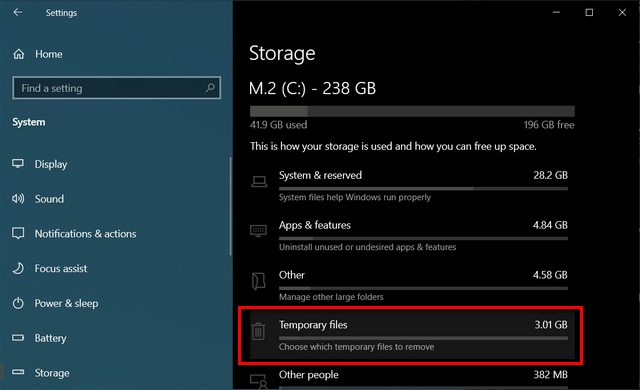
Now, scroll down if you have to and click on ‘Temporary files’. If you don’t see Temporary files listed, select ‘Show more categories’.
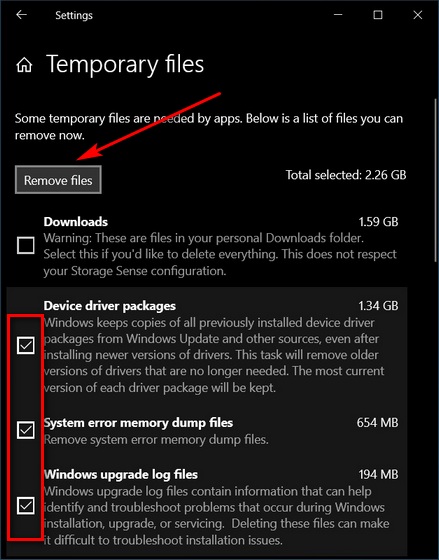
Once the results are displayed, select the items you want to delete, and then click on ‘Remove files’.
Method 2: With Disk Cleanup
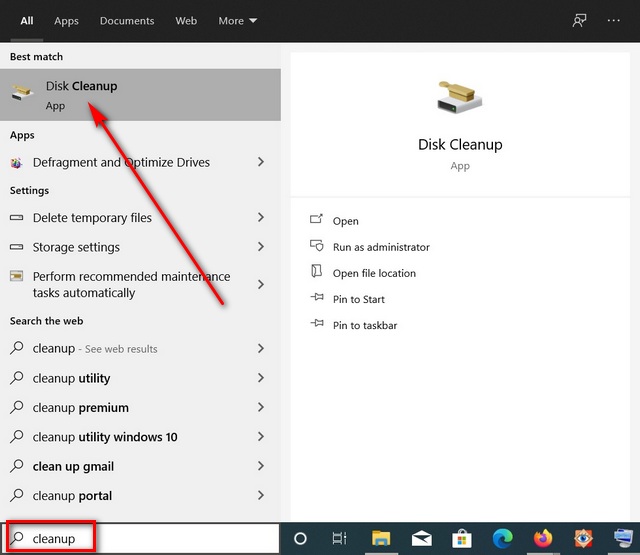
In the search box on the taskbar, type “cleanup”, and select ‘Disk Cleanup’ from the list of results.
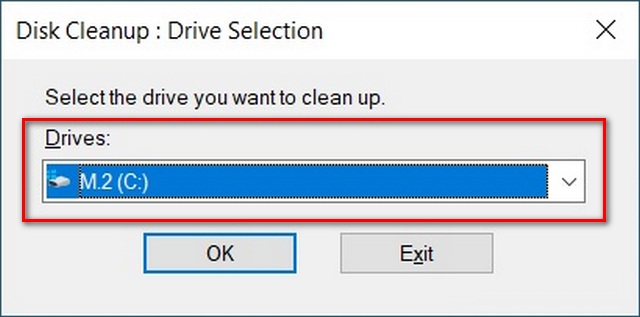
Next, you might have to select the target disk manually from the drop-down menu (as seen below) if you have multiple physical drives or partitions. If not, you’ll automatically be taken to the next step.
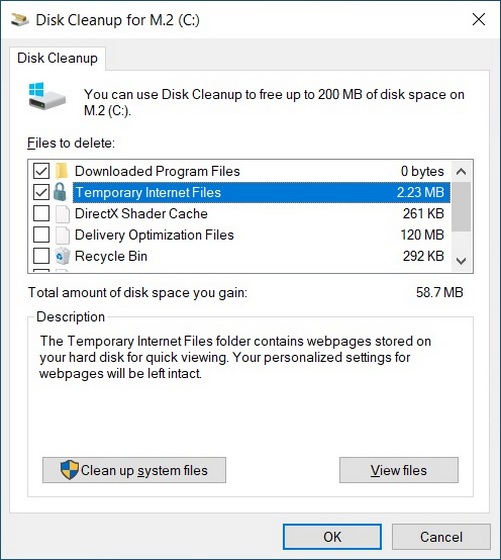
From the available options, select the file types you want to get rid of. Then click ‘OK’ to manually delete temp files and folders.
Pro Tip: If you need to free up more space, you can also delete system files by clicking on the ‘Clean up System Files’ option and selecting the file types to get rid of.
Method 3: Using Temp Folder
You can also manually delete temp files in Windows 10. For that, go through the following steps:
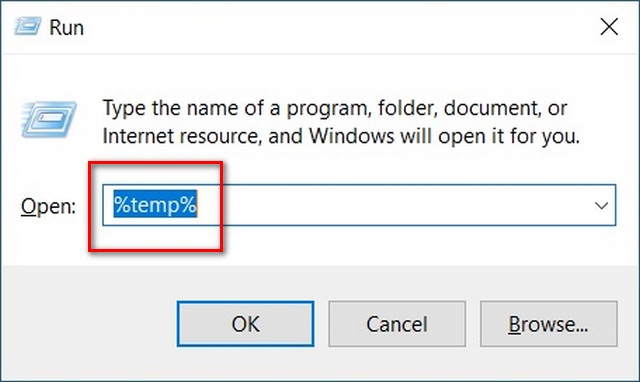
Open the ‘Run’ dialog box (Windows key + R) and type or copy+paste “%temp%” (without quotes). Hit Enter or ‘OK’.
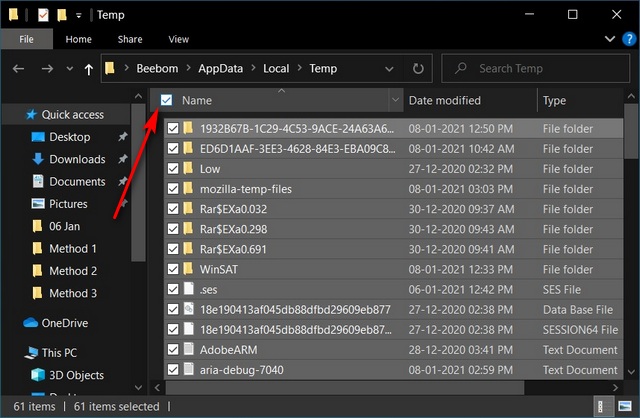
This will open up the ‘Temp’ folder where Windows stores much of the temporary files. Select all the files and folders here by clicking on the ‘Select All’ option and press the ‘Delete’ key on your keyboard to remove all of that to the Recycle Bin.
Note: To select individual files, hover over the filenames and click on the selection box that appears.
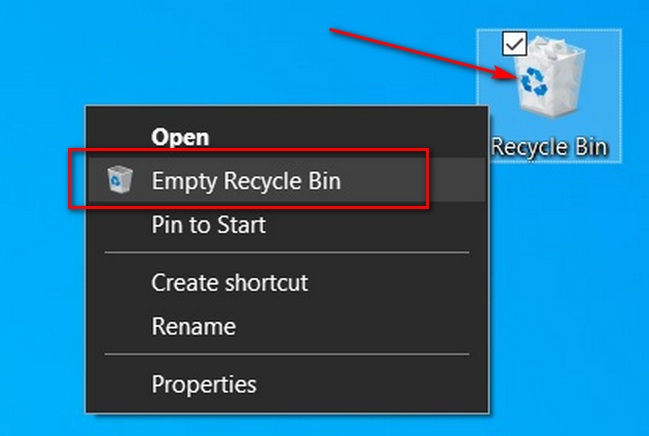
Finally, right-click on the Recycle Bin icon on your desktop and click on ‘Empty Recycle Bin’. Confirm if asked.
Note: If you don’t see the Recycle Bin icon on your desktop, you can get it back easily by checking out how to restore missing features in Windows 10.
Method 4: Via ‘Storage Sense’
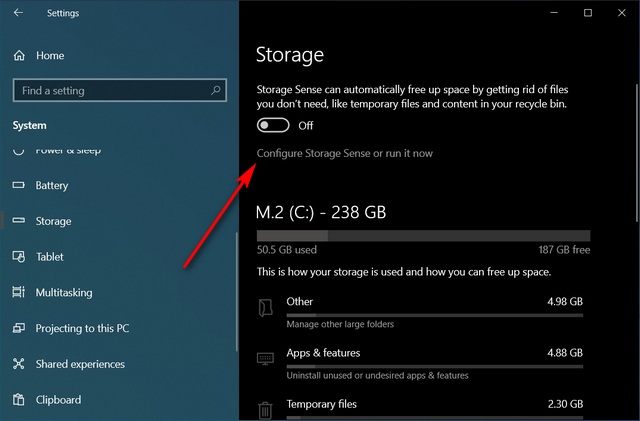
Windows 10 comes with a built-in service to automatically delete temporary files on a schedule. Called ‘Storage Sense’, the feature is turned off by default, but you can turn it on in a few simple clicks. What’s more, you can also customize it and specify how it works automatically on your computer.
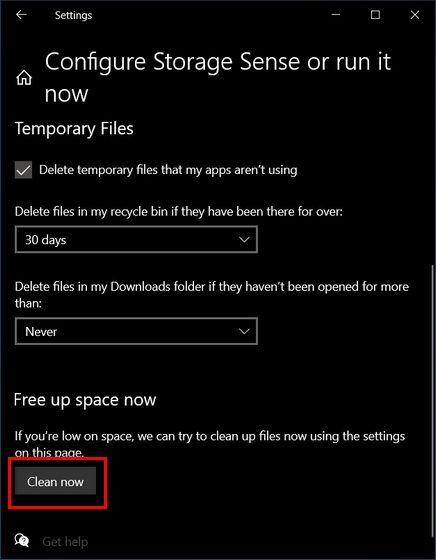
To use Storage Sense in Windows 10, go to Settings > System > Storage as described in Method 1. Now click on ‘Configure Storage Sense or run it now’ to configure it manually.
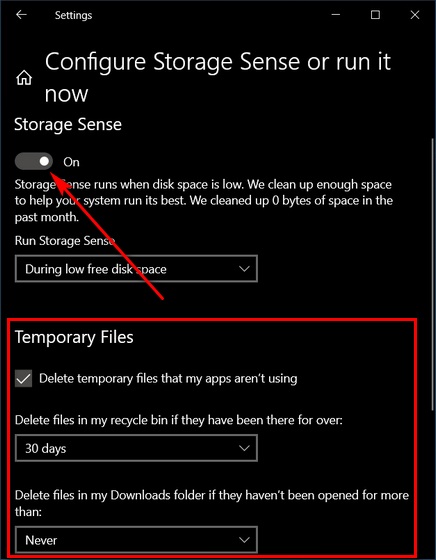
Now toggle the feature ‘On’. If you leave it at that, it will run with the default options. However, you can use the options below to specify how often Storage Sense should clear out temporary files, Recycle Bin, etc.
As you can see, you can not only configure Storage Sense to run automatically on your device, but also run the utility on-demand by clicking on the ‘Clean Now’ button to free-up space on your Windows 10 computer.
Note: Storage Sense can also be configured to clear locally cached files of cloud storage services, such as iCloud, One Drive, and more.
Method 5: From the Command Prompt
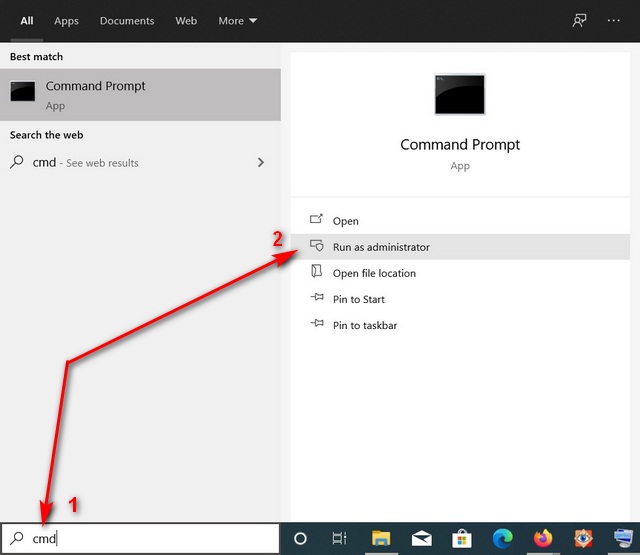
Open Windows Command Prompt in Admin mode by searching ‘cmd’ in the Windows Search Bar and selecting ‘Run as administrator’.
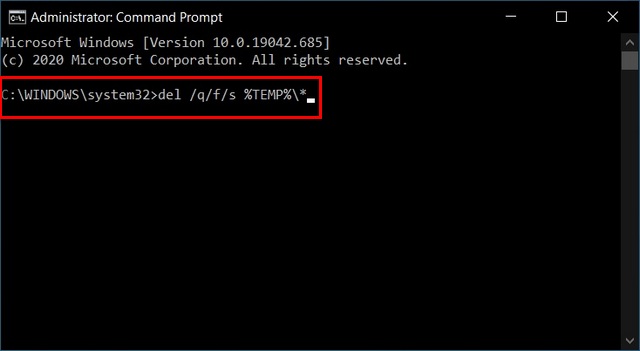
Now type in del /q/f/s %TEMP%* and hit ‘Enter’. This should clear all the temporary files in the ‘Temp’ folder on your PC.
Reclaim Storage Space on Your PC by Removing Temporary Files
You can speed-up your computer and reclaim oodles of storage space by deleting junk files in Windows 10. Even if you have a lot of available storage on your PC, it’s just good practice that should be followed for optimum PC maintenance. And while we’re talking about PC maintenance best practices, you should also check out our Windows 10 tips and tricks to get the most out of your computer.
